Manage Approvals
Manage approvals streamlines the approval process and automatically route trip requests to the dedicated assigned approvers based on the predefined rules, such as department or vehicle type. Multiple approvers can be assigned at each level, ensuring requests do not get stuck if one approver is unavailable. All approval actions are tracked, providing a clear audit trail for transparency and accountability.
Navigate to the Manage Approvals
-
Click the Settings icon on the left side of the page.
-
Click Manage Approvals option.
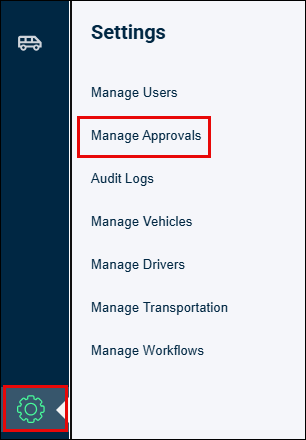
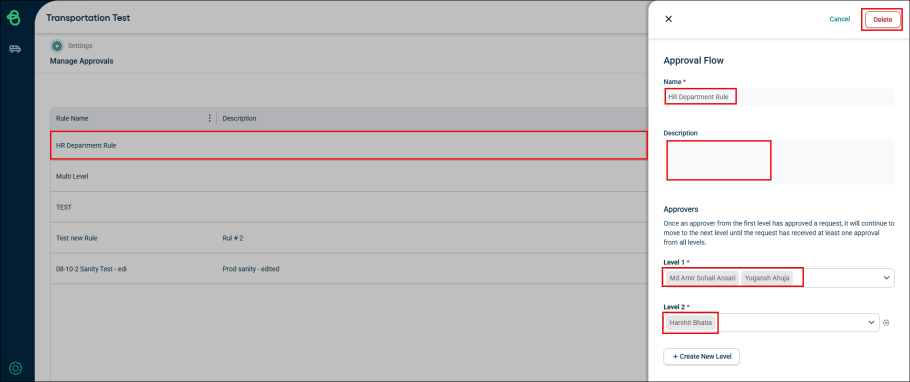
Manage Approvals page appears.

Create an Approval Rule
Perform the below steps to create a new Approval Rule:
-
Click Add New Rule button at the upper right corner of the page.

-
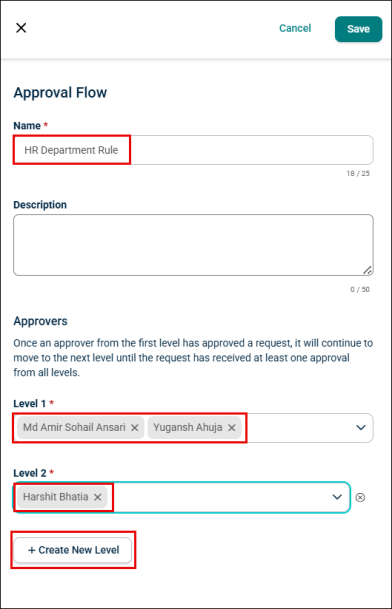
Enter the Rule name in the Name field.
NOTE Make sure the name should not exceed 25 characters.
-
Optionally, enter a Description to describe the Rule.
-
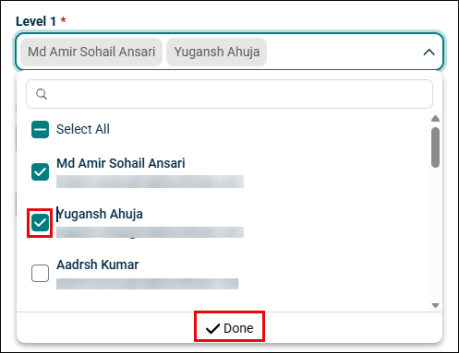
Enter and select the approvers from the Level 1 and Level 2 drop-down lists, then click Done.
NOTE * The request moves to the next level only if at least one approver from the previous level approves it.
* User can add Multiple approvers in each level.
-
Click Create New Level button to add a new level approver.
NOTE Maximum of 5 levels of approvers can be created.
Edit and Manage the Approval Rules
Users can edit, delete, and manage the approval from Manage Approvals landing page.
-
Enter a Rule Name in the search bar at the upper right corner of the page.

-
Click a Rule name or Edit button to modify.
-
Click the Name field to make changes in the rule name.
-
Optionally, enter a description to the Description field.
-
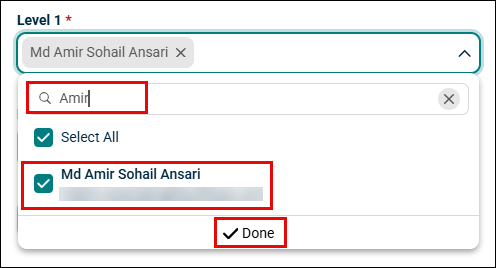
Click Level 1 or Level 2 drop-down list, then select or clear the checkbox to add or remove the approvers, and then click Done.